Home » Interior Basement Waterproofing in Toronto, Ontario
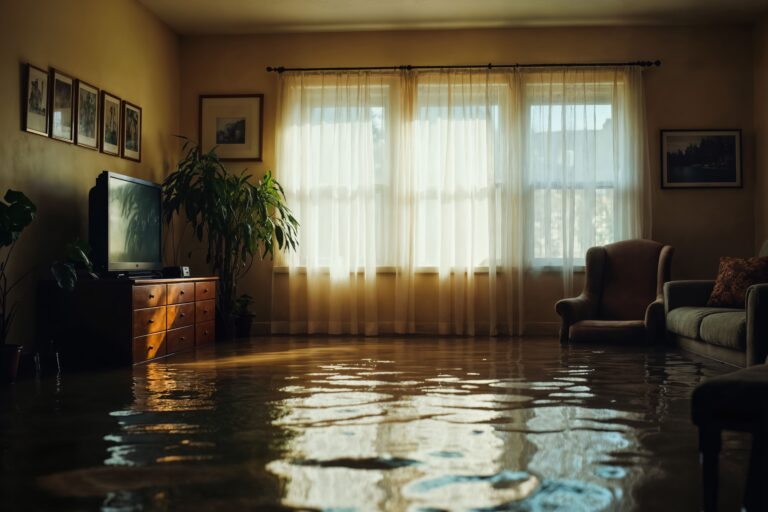
Water in a basement rarely fixes itself. It starts as a damp patch along the bottom of a wall or a puddle after a spring thaw, and over time it can lead to mould, damaged finishes, musty air and costly wet basement repairs. Interior basement waterproofing stops that cycle from the inside: it captures water where it enters the basement and sends it safely out of the house before it can reach your floors, walls and belongings.
At Leaquida Waterproofing, we design and install interior waterproofing systems for houses across Toronto and the GTA. Every project starts with an inspection of your foundation, drainage and the exact points where water gets in. Based on what we find, we recommend a system that fits your basement — from a single crack injection to a full perimeter drainage system with a sump pump.
Interior foundation waterproofing is often the most practical choice for Toronto homes with finished landscaping, driveways, decks or tight side yards, where digging outside is difficult or expensive. The work is done entirely from inside the basement, and the system stays hidden under the floor and behind the walls once it is complete.
What Is Interior Basement Waterproofing?
Interior basement waterproofing is a water management system installed inside the basement, along the base of the foundation walls. Instead of trying to keep every drop of water out of the concrete, it relieves the pressure that pushes water in and gives that water a controlled path out of the house. The result is a dry basement even when the soil around the foundation stays wet.
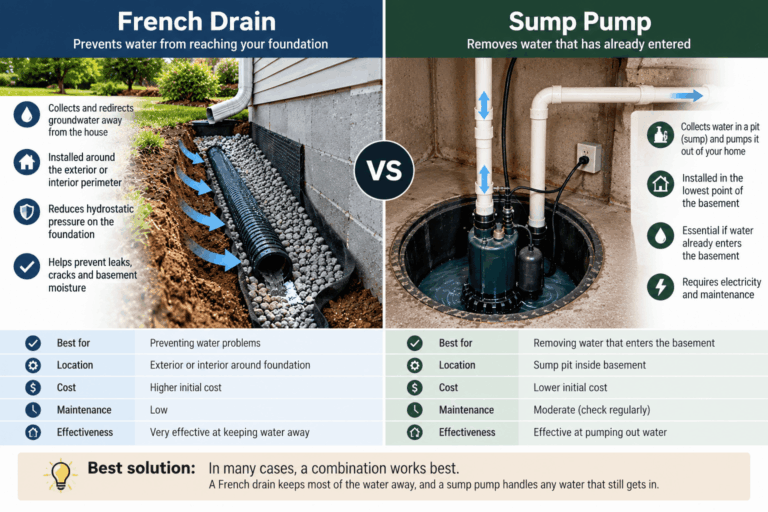
Most interior systems combine several parts that work together: a drainage pipe or channel below the floor along the perimeter, a dimpled membrane on the walls that guides seepage down into that drain, sealed cracks, and a sump pump that lifts the collected water and discharges it outside. Depending on the house, the system may also include a backwater valve or window well upgrades.
How an Interior Drainage System Works
A narrow trench is cut in the basement floor along the foundation walls.
A perforated drainage pipe is laid in clear gravel in the trench, slightly sloped toward a sump pit.
A dimpled membrane is installed on the lower part of the walls so that any water coming through the wall runs down behind it into the drain.
Water collected by the pipe flows into the sump pit, where the sump pump discharges it outside, away from the foundation.
The trench is closed with new concrete, and the floor is restored.
Because water is collected below the floor slab, it never reaches the finished surface. This is why interior drainage works well for leaks at the joint between the wall and the floor — the most common entry point in older Toronto basements.
Interior Waterproofing vs. Damp-Proofing
Damp-proofing is a coating or sealant applied to a wall to slow down moisture absorption. It does not handle water under pressure, it does not drain anything, and it cannot stop an active leak. Interior waterproofing, by contrast, manages liquid water: it collects it, redirects it and removes it from the house. If your basement has visible water, efflorescence or recurring leaks after rain, a coating alone will not solve the problem — you need a drainage-based system.
When Is Interior Waterproofing the Right Choice?
Interior waterproofing is not the answer to every wet basement, but for many Toronto houses it is the most practical and cost-effective one. It is usually the right choice in these situations:
Water enters at the base of the walls. Seepage along the joint between the wall and the floor is exactly what an interior perimeter drain is designed to collect.
The exterior weeping tile has failed. Instead of digging down to the footings to replace old clay tile, an interior drain takes over its job from the inside.
Digging outside is difficult or expensive. Interlocking driveways, mature gardens, decks, porches, air-conditioning units and narrow side yards all make exterior excavation slower and more costly to restore.
The house shares a wall with a neighbour. In semi-detached and row houses, the shared wall cannot be excavated from outside at all.
You need to work in any season. Because everything happens indoors, the project does not depend on frozen ground or wet weather.
You want a solution with predictable disruption. The work zone is limited to a strip along the basement walls, and the rest of the house stays in normal use.
Interior waterproofing on its own may not be enough when large areas of the walls are actively leaking, when the foundation wall is deteriorating, or when water comes from a sewer backup. In those cases, we combine it with crack repair, exterior work or a backwater valve, and explain why in the quote.
Signs You Need Interior Waterproofing
Many homeowners only notice a water problem once finishes are already damaged. Watch for these early warning signs — the sooner the source is found, the smaller and cheaper the repair:
water seeping in where the wall meets the floor, especially after rain or snowmelt;
puddles or wet spots on the basement floor;
damp or dark patches on the lower part of foundation walls;
white, chalky deposits (efflorescence) on concrete;
a musty smell that stays after cleaning and airing out;
mould or mildew on baseboards, drywall or stored items;
peeling paint, bubbling drywall or warped flooring;
rust on metal posts, appliances or items stored on the floor;
cracks in foundation walls or the floor slab that let water in;
a sump pump that runs constantly — or never runs during wet weather.
The best time to check is during or right after a heavy rain or spring thaw. Walk through the basement with a flashlight, look at the base of every wall and around floor drains, and touch the lower part of the walls and any carpet. Take photos of anything you find — they help us understand the problem before the inspection.
If you have noticed one or more of these signs and they keep coming back despite temporary fixes, the cause is usually water pressure in the soil around the foundation. An inspection will show where the water enters and which solution will stop it for good. For an active leak, see our basement leak repair service.
Noticed any of these signs?
Book an inspection and find out where the water is coming from
Interior waterproofing works best when it targets the actual cause of the leak. According to the City of Toronto, basements flood for two main reasons: stormwater or groundwater seeping in through foundation cracks, poor drainage, failed weeping tiles or broken sump pumps, and sewer backups. These are the problems we see most often during inspections:
Hydrostatic Pressure
When the soil around a foundation becomes saturated after heavy rain or snowmelt, the water in it presses against the walls and the underside of the floor slab. This pressure pushes water through any weak point in the concrete. Interior drainage relieves that pressure by giving the water an easier path — into the drain and out through the sump pump.
Cove Joint Leaks
The cove joint is the seam where the foundation wall meets the basement floor. The wall and the floor are poured separately, so this joint is never fully watertight. It is the most common entry point for water in older homes and the main reason homeowners see water along the base of the walls rather than in the middle of the floor.
Foundation Wall Cracks
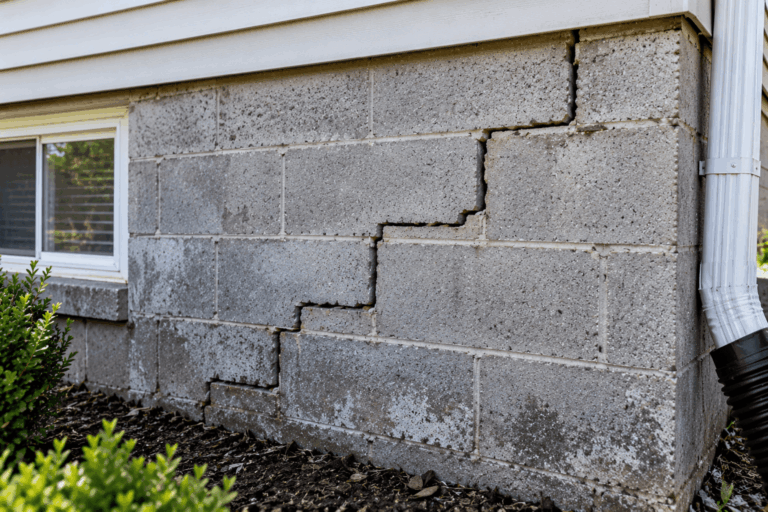
Concrete shrinks as it cures and moves as the soil freezes and thaws. Over time, this creates vertical, diagonal or horizontal cracks in foundation walls. Small cracks can be sealed with injection; wide or growing cracks may point to a structural issue that needs foundation repair before waterproofing.
Floor Slab Cracks and Seepage
Water under pressure can also push up through cracks in the basement floor or around floor drains. Interior drainage installed below the slab lowers the water level under the floor and reduces this type of seepage.
Failed or Clogged Weeping Tile
Many older Toronto houses have clay weeping tile around the footings that has collapsed, separated or filled with silt and roots. Once the exterior drain stops working, water builds up against the foundation. An interior drainage system replaces its function from the inside without digging up the yard.
Window Wells and Tie Rod Holes
Water often enters right below basement windows when a window well fills up, and through tie rod holes — small openings left in poured walls from the forms used during construction. Both can be sealed, and window wells can be upgraded with proper drainage through our window well waterproofing service.
Sewer Backups
During intense storms, the municipal sewer can surcharge and push water back into the house through floor drains. Interior drainage does not stop this type of flooding — a backwater valve does. We check for backup risk during the inspection and recommend a valve when it is needed.
Interior Waterproofing for Different Types of Toronto Homes
Toronto has a wide mix of housing — from century-old brick homes to recent infill builds — and each type of foundation tends to leak in its own way. We design the interior system around how your house was built.
Older Brick and Stone Foundation Homes
Many pre-war houses in the older parts of the city have rubble stone, brick or early concrete foundations and original clay weeping tile. Water often enters through the lower part of the walls and the floor joint, and the exterior drain has usually stopped working long ago. A full interior perimeter drain with a sump pump is often the most practical way to keep these basements dry without disturbing the house’s exterior.
Semi-Detached and Row Houses
When one wall of the basement is shared with a neighbour, it cannot be waterproofed from outside. Interior drainage can be installed along the shared wall from your side only, without any work on the neighbouring property, and connected to the same sump pit as the rest of the system.
Homes with Concrete Block Foundations
Hollow concrete blocks can fill with water and release it slowly through the mortar joints and the bottom course of blocks. Interior systems for block walls collect water at the base of the wall, and the membrane directs any seepage from the cores down into the drain.
Newer Homes with Poured Concrete Foundations
Poured concrete walls are more water-resistant, but shrinkage and settlement cracks are common. If water enters through one or two cracks, crack injection may be enough. If seepage appears along the floor joint or in several places, an interior drain is the more reliable fix.
Interior Waterproofing Systems We Install in Toronto
Every basement needs a solution that matches the source of the water. After the inspection, we combine the components below into one system designed for your foundation.
Interior Perimeter Drainage System
The core of most interior foundation waterproofing projects. We install a perforated drainage pipe in clear gravel below the basement floor along the walls where water enters — either around the full perimeter or along one problem section. The drain collects seepage from the walls and the cove joint and carries it to a sump pit.
Sump Pump and Battery Backup
The sump pump lifts the collected water and discharges it away from the foundation. We size the pump for the expected water volume and can add a battery backup that keeps it running during a power outage — often exactly when a storm hits. Learn more about our sump pump installation service.
Wall Membrane and Vapour Barrier
A dimpled plastic membrane is fastened to the lower part of the foundation walls. Water that seeps through the wall runs down behind the membrane into the drain instead of soaking into framing and drywall. In finished basements, the membrane also acts as a vapour barrier and reduces humidity.
Foundation Crack Injection
Individual cracks in poured concrete walls are sealed from the inside by injecting polyurethane or epoxy. This is often the right solution when water enters through one or two cracks and the rest of the basement stays dry. See our crack repair service for details.
Backwater Valve
A backwater valve closes automatically when the sewer backs up, protecting the basement from sewage entering through floor drains. It is often installed together with interior drainage, and it is one of the devices covered by the City of Toronto subsidy. More about backwater valve installation.
French Drain and Window Well Drainage
Where surface water collects near the house or below basement windows, we add a French drain or window well drainage to take pressure off the foundation. For houses where water pressure outside is too high for an interior system alone, we also offer exterior waterproofing.
We are the best in the field!
Fully licensed
Transparent process
Insured
Affordable
How to Choose an Interior Waterproofing Contractor in Toronto
Interior waterproofing is built into the floor of your home, so it is worth comparing contractors carefully. Before you sign, check that the company:
Inspects the basement in person and explains where the water is coming from, instead of quoting a price over the phone.
Provides a written quote that lists the length of drainage, the type of pump, the membrane and every other component.
Offers a written warranty and explains what it covers — materials, workmanship or both.
Holds a valid City of Toronto business licence — this is also a condition of the City’s basement flooding subsidy.
Is insured for the work being done in your home.
Explains the discharge plan for the sump pump and whether a backwater valve or permit is needed.
Can show completed work — photos of real projects or references from homeowners.
Recommends the right scope, not the largest possible system. If crack injection or better grading will solve your problem, a good contractor will tell you.
Why Choose Leaquida Waterproofing
Choosing the right contractor matters as much as choosing the right system. Homeowners across Toronto and the GTA work with us because we offer:
a detailed inspection that looks for every source of water, not only the visible leak;
honest recommendations — we suggest the smallest solution that will reliably solve the problem;
experienced waterproofing specialists who handle drainage, sump pumps, crack repair and foundation work;
durable materials and proven installation methods;
a written quote with every component listed and no hidden fees;
clear timelines and a clean, protected work area;
a written warranty covering materials and workmanship;
Every project follows the same structured process, so you know what happens at each stage and what your basement will look like when we leave.
Step 1: Basement Inspection
We inspect the walls, floor, cove joint, cracks, window wells, floor drains and any existing sump pit. We also look at grading, downspouts and signs of sewer backup outside to find every source of water, not just the most visible one.
Step 2: Recommendation and Written Quote
You receive a clear recommendation: what we propose to install, why, and what it will cost. If a smaller solution such as crack injection will solve the problem, we say so.
Step 3: Preparation and Protection
We clear a work zone along the affected walls, protect floors and belongings, and set up dust control. In finished basements, we remove only the lower section of drywall or flooring needed to reach the wall and floor joint.
Step 4: Trench Excavation Along the Walls
We cut and remove a narrow strip of the concrete floor along the foundation and excavate a trench down to the level needed for the drain.
Step 5: Drain, Membrane and Sump Installation
We lay the perforated pipe in clear gravel, install the wall membrane, set the sump basin and pump, and connect the discharge line. Cracks are sealed at this stage, and a backwater valve is added if it is part of the plan.
Step 6: Concrete Restoration
The trench is filled and finished with new concrete, levelled with the existing floor. Once the concrete has cured, the basement is ready for flooring and walls again. If you plan a larger floor upgrade, see our concrete floor installation service.
Step 7: System Testing and Handover
We run water through the system to confirm it drains to the pump and discharges properly, then walk you through how it works and how to maintain it. You receive the written warranty for the materials and workmanship.
You can see examples of completed projects in our gallery.
Want to know what your basement needs?
Start with an inspection
Knowing what happens on installation day helps you plan around the work and keeps the project stress-free:
Before we arrive: clear the space along the walls where the system will be installed, and move stored items, furniture and anything fragile out of the work zone.
During the work: expect noise while the concrete floor is cut, and some dust, which we control with protection and cleanup. The rest of the house stays in normal use.
Access: our crew needs a clear path from the entrance to the basement to bring in materials and carry out concrete and soil.
After the concrete is poured: keep foot traffic off the new concrete strip until it has cured, as we advise on the day.
Before you leave the system alone: we test the drain and the pump with you, show you the sump pit and the discharge, and explain the simple maintenance steps.
The exact schedule depends on the length of drainage and the scope of work and is confirmed in your written quote.
Our Basement Waterproofing Services
EXTERIOR
Exterior waterproofing is one of most efficient and reliable ways to perform waterproofing of your property.
Materials Used in Interior Foundation Waterproofing
An interior system is only as reliable as the materials inside it. These are the main components we use and what each one does:
Component
What It Does
Where It Is Installed
Perforated drainage pipe
Collects water from the walls and the cove joint
Below the floor slab, along the foundation walls
Clear gravel
Lets water flow freely to the pipe and keeps soil out
Around the drainage pipe in the trench
Dimpled wall membrane
Directs seepage down into the drain; works as a vapour barrier
On the lower part of the foundation walls
Sump basin and pump
Collects water from the drain and pumps it outside
In a pit in the basement floor
Battery backup pump
Keeps the system working during a power outage
Next to the main sump pump
Check valve and discharge line
Prevents water from flowing back into the pit and carries it outside
On the pump discharge pipe
Polyurethane or epoxy injection
Seals cracks in poured concrete walls
Inside foundation cracks
New concrete
Restores the floor over the trench
Along the perimeter of the basement floor
The exact set of materials depends on your basement and is listed in the written quote.
H2: Interior Basement Waterproofing Cost in Toronto
The cost of interior waterproofing depends on how much of the basement needs drainage, how the water enters, whether the basement is finished and which components the system includes. The table below shows typical price ranges for the main parts of an interior system in Toronto:
Component
Approximate Cost
Interior perimeter drain
$60–$100 per linear foot
Sump pump system
$900–$2,000
Vapour barrier installation
$1,000–$2,500
Crack injection (per crack)
$300–$800
Labour and disposal fees
Varies
The main factors that affect the final price:
the length of wall that needs drainage — one section or the full perimeter;
the source and amount of water entering the basement;
whether the basement is finished and how much drywall or flooring must be removed and restored;
the depth of the footings and the condition of the floor slab;
the need for a new sump pit, battery backup or backwater valve;
access to the basement for removing concrete and soil.
Quotes from different companies can vary widely for the same basement. The difference usually comes from what is included: the length of drain, the depth of the trench, the type of membrane, the size and quality of the pump, whether a battery backup and check valve are part of the price, and how the floor and finishes are restored. When you compare quotes, compare the components line by line, not only the total.
The most accurate number comes after an on-site inspection. We provide a written quote that lists every component, so you can compare options before deciding.
City of Toronto Basement Flooding Protection Subsidy
Some parts of a waterproofing project can be partly covered by the City. Through the Basement Flooding Protection Subsidy Program, registered owners of single-family homes, duplexes, triplexes and fourplexes in Toronto can receive up to $6,650 per property for flood protection devices installed or services completed on or after November 12, 2025:
Device or Service
Maximum Subsidy
Home plumbing assessment
Up to $500 (80% of cost)
Backwater valve (up to 2 devices)
Up to $1,600 per device (80% of cost)
Sump pump
Up to $2,250 (80% of cost)
Battery backup for sump pump
Up to $300 additional (80% of cost)
Foundation drain severance and capping
Up to $400 (80% of cost)
Key conditions set by the City: a building permit is required for backwater valve installation, the contractor must hold a valid City of Toronto business licence at the time of installation, downspouts must be disconnected from the sewer (or exempted), and the application must be submitted within two years of installation. Always check the current rules on the City’s website before you apply.
Get an exact price for your basement — with every component listed.
Both methods protect the basement from water, but they work at different points. Exterior waterproofing stops water on the outside of the foundation wall. Interior waterproofing lets water reach the wall, then collects it and removes it before it enters the living space.
Factor
Interior Waterproofing
Exterior Waterproofing
Where the work is done
Inside the basement
Outside, along the foundation walls
Excavation of the yard
Not required
Required down to the footings
Impact on landscaping, decks, driveways
None
Areas next to the walls must be dug up and restored
Best for
Cove joint leaks, floor seepage, failed weeping tile, homes with limited outside access
Wall leaks over large areas, high water pressure, when the wall surface itself must be sealed
Work in winter
Possible, as the work is indoors
Depends on ground and weather conditions
Effect on the basement
Lower part of finishes removed and restored
Basement finishes usually stay in place
Interior waterproofing is usually the better choice when:
water enters at the joint between the wall and the floor;
digging outside would damage landscaping, a driveway, a deck or a shared wall;
the exterior weeping tile has failed and replacing it from outside is impractical;
you need a cost-effective solution with less disruption outside.
Exterior waterproofing may be recommended when large areas of the walls are leaking, water pressure outside is very high, or the foundation wall itself needs to be sealed and protected. For most Toronto houses with seepage at the floor joint, interior waterproofing delivers the same practical result — a dry basement — with less disruption and at a lower cost than full exterior excavation. In some homes, the best result comes from combining both methods, together with foundation waterproofing on the most exposed walls.
Interior Waterproofing Compared to Other Wet Basement Solutions
Homeowners often try quick fixes before calling a waterproofing company. Some help with minor moisture, but none of them replace a drainage system when water is actively entering the basement:
Solution
What It Does
Stops Active Leaks?
When It Makes Sense
Waterproof paint or sealant
Coats the inside of the wall to slow moisture absorption
No
Light dampness with no visible water
Dehumidifier
Removes moisture from the air
No
Controlling humidity in an already dry basement
Crack injection only
Seals individual cracks in poured concrete walls
Yes, at the sealed crack
Water enters through one or two wall cracks
Sump pump only
Removes water that reaches an existing pit
Partly
A working drain already leads to the pit
Interior drainage system
Collects water at the walls and floor joint and pumps it out
Yes
Seepage at the wall-floor joint, failed weeping tile
Exterior waterproofing
Seals and drains the outside of the foundation wall
Yes
Large leaking wall areas, high outside water pressure
During the inspection, we look at where and how water enters and recommend the simplest option that will actually work — sometimes that is crack injection or better grading rather than a full system.
Interior Waterproofing for Finished and Unfinished Basements
Finished Basements
Interior waterproofing can be installed in a finished basement. To reach the joint between the wall and the floor, we remove the lower part of the drywall and baseboards along the affected walls, and lift flooring in the work zone. Furniture and finishes in other areas are protected. After the drain and membrane are installed, the wall can be rebuilt over the system, which stays hidden behind the finished surface. If mould has already appeared behind the drywall, the affected materials should be replaced rather than covered.
Unfinished Basements
An unfinished basement is the easiest and most cost-effective place to install an interior system, because there are no finishes to remove or restore. It is also the best time to waterproof: if you plan to finish the basement later, installing the drainage and wall membrane first protects your future investment in flooring, drywall and furniture.
Important Considerations Before You Start
A few questions are worth answering before the work begins. They affect the design of the system, the price and the result:
Do You Plan to Finish the Basement?
If you plan to add a family room, office or rental unit, tell us before installation. We will place the membrane and the sump pit so that they fit your future layout, and you will not need to open the walls again later.
Is There Mould or Water Damage Already?
Wet drywall, insulation and carpet that have been exposed to repeated leaks should be removed rather than covered over. We point out damaged materials during the inspection so they can be replaced while the walls are open.
Where Will the Water Be Discharged?
The sump pump discharge must lead water well away from the foundation, not onto a neighbour’s property or back toward the house. We plan the discharge location and the line route as part of the design.
Is There a Risk of Sewer Backup?
If floor drains have backed up in the past, interior drainage alone will not prevent it. A backwater valve may be needed, and in Toronto it requires a building permit.
Can Part of the Cost Be Subsidized?
Sump pumps, battery backups and backwater valves may qualify for the City of Toronto subsidy described above. Keep all invoices and permit documents if you plan to apply.
Best Time of Year for Interior Waterproofing
Because interior waterproofing is installed entirely inside the basement, it can be done in any season. Frozen ground, snow and rain do not stop the work the way they can stop exterior excavation.
That said, timing still matters. The best time to install a system is before the wettest periods of the year — ahead of the spring thaw and before heavy fall rains — so the basement is protected when water pressure around the foundation is highest. Winter can also be a convenient time, because scheduling is often more flexible and the work does not depend on the weather.
If water is already coming in, do not wait for a particular season. Every new leak adds moisture to the concrete and finishes, and small problems become more expensive to fix over time.
Waterproofing a Basement Apartment or Rental Unit
Many Toronto homeowners finish their basements as a second suite, a home office or space for family. A dry basement is the foundation for any of these plans. Water damage in a rented unit can mean damaged tenant belongings, emergency repairs and lost rental income, so it is far better to deal with seepage before the space is finished.
If you are planning a basement apartment, install the interior drainage, wall membrane and sump pump before framing and insulation go in. This way, the system is completely hidden behind the finished walls, and you will not need to open them again later. If the unit is already finished and showing signs of water, we can install the system with minimal removal of finishes and restore the work area once the drain is in place.
Benefits of Interior Basement Waterproofing
A well-designed interior system does more than stop a leak. It changes how you can use your basement and how much you worry about the next storm. These are the main benefits homeowners notice after installation:
A dry basement all year. Water is collected below the floor and removed before it reaches your finishes, in spring thaw and during summer storms.
No digging outside. Gardens, driveways, patios and decks stay untouched, and there is no need to excavate along a shared wall.
Lower humidity and less mould risk. Removing water and adding a vapour barrier helps keep indoor humidity under control.
More usable space. A dry basement can be safely finished as a family room, home office or rental unit.
Protection for your belongings. Furniture, stored items, mechanical equipment and flooring are no longer exposed to seepage.
Year-round installation. Because the work is done indoors, interior systems can be installed in winter as well as in summer.
A long-term fix, not a patch. The system manages water pressure instead of only sealing the surface, so the leak does not simply move to another spot.
A small leak rarely stays small. Every wet season adds more moisture to the concrete, finishes and air, and the cost of fixing the damage grows each year:
Mould and poor indoor air.Health Canada notes that people living in homes with mould may experience eye, nose and throat irritation, coughing, wheezing and worsening asthma symptoms, and recommends keeping indoor relative humidity between 30% and 50%.
Damaged finishes and belongings. Drywall, insulation, carpet, laminate and anything stored on the floor absorb water and often have to be thrown away.
Growing cracks. Water and freeze–thaw cycles can widen existing cracks in the foundation over time.
Rust and equipment damage. Furnaces, water heaters and appliances standing in damp conditions corrode faster.
Lower property value. Signs of water damage in a basement are a common concern for buyers and home inspectors.
Common Interior Waterproofing Mistakes to Avoid
A poorly planned system can leave you with the same leak — or a new one. These are the mistakes we see most often when we are called to fix someone else’s work:
Sealing the wall instead of draining the water. Paint and coatings on the inside of a wall cannot hold back water under pressure. The water simply finds another way in, often at the floor joint.
Draining only part of the problem. Installing a drain along one wall when water also enters along another leaves the basement wet. A proper inspection maps every entry point before the system is designed.
No sump pump or an undersized pump. Collected water must be removed from the house. A pump that is too small, or no pump at all, can turn the drain into a reservoir under the floor.
No backup power. Heavy storms often come with power outages. Without a battery backup, the pump stops exactly when it is needed most.
Discharging water too close to the house. If the discharge line ends next to the foundation, the same water soaks back into the soil and returns to the basement.
Covering wet or mouldy materials. Building new walls over damp drywall, insulation or framing traps moisture and hides mould instead of removing it.
Ignoring sewer backup risk. Interior drainage handles groundwater, not sewage. Homes with a history of floor drain backups also need a backwater valve.
Why Toronto Homes Need Interior Waterproofing
A large share of Toronto’s housing was built decades ago, long before modern drainage membranes, plastic weeping tile and sump pumps became standard. Many of these foundations were never designed to handle today’s water levels, intense storms and the extra hard surfaces — driveways, patios and roads — that send more water toward homes.
Toronto basements face a combination of local conditions that make water problems common, especially in older neighbourhoods:
Heavy rain and spring snowmelt that saturate the soil around foundations for weeks at a time;
clay-rich soils that hold water against the walls instead of letting it drain away;
aging foundations with original clay weeping tile that has collapsed or clogged over decades;
tight lots and shared walls in semi-detached and row houses, where digging outside is difficult;
sewer backups during intense storms, when the municipal system becomes overloaded.
The City of Toronto recommends that homeowners take their own steps to protect their homes, including disconnecting downspouts, keeping eavestroughs clear, maintaining proper lot grading and installing sump pumps where needed, and notes that city sewer improvements alone cannot fully protect a home from basement flooding (source). A properly designed interior waterproofing system is one of the most effective of these steps for houses with leaks through the foundation.
Maintaining Your Interior Waterproofing System
An interior system needs very little care, but a few simple checks keep it working when you need it most:
Test the sump pump twice a year — before spring thaw and before the fall rains — by pouring water into the pit and making sure the pump starts and stops.
Check that the discharge line outside is clear of ice, snow, leaves and debris.
Test the battery backup and replace the battery as recommended by the manufacturer.
Keep the area around the sump pit clear so the pump is easy to reach.
Make sure downspouts discharge away from the house and the ground slopes away from the foundation.
If the pump runs constantly or you notice new damp spots, call us for a system check.
Signs Your Existing System Needs Service
Already have an interior drainage system or a sump pump, but the basement is getting wet again? These signs mean the system needs attention:
the sump pump hums but does not pump, or cycles on and off every few minutes;
water appears along a wall that was dry after the original installation;
the sump pit fills with silt, gravel or debris;
you hear water running back into the pit after the pump stops — a sign of a failed check valve;
the discharge line is frozen, crushed or disconnected outside;
the battery backup alarm sounds or the battery is several years old.
We service and upgrade existing interior systems, including systems installed by other contractors. Often, a new pump, a cleaned pit or a repaired discharge line is all it takes to restore full protection.
Warranty and Long-Term Protection
Every project completed by Leaquida Waterproofing comes with a written warranty covering both materials and workmanship. The warranty terms for your project are stated in your quote, so you know exactly what is covered before work begins. Combined with simple maintenance, a professionally installed interior system provides dependable protection for your basement for many years.
FAQ about Interior Basement Waterproofing in Toronto, Ontario
How does interior basement waterproofing work?
Interior basement waterproofing manages water from the inside. A drainage pipe is installed below the floor along the foundation walls, a membrane on the walls guides seepage down into it, and a sump pump discharges the collected water outside. Water is removed before it reaches your floors and finishes, so the basement stays dry even when the soil outside is wet.
How much does interior basement waterproofing cost in Toronto?
Typical prices start at $60–$100 per linear foot for an interior perimeter drain, $900–$2,000 for a sump pump system and $300–$800 per crack for injection. The total depends on how much of the basement needs drainage, whether it is finished and which components are required. We give an exact price in a written quote after inspecting your basement.
Is interior or exterior basement waterproofing better?
Neither is better in every case. Interior waterproofing is usually the right choice for leaks at the wall-floor joint, failed weeping tile and homes where digging outside is difficult. Exterior waterproofing is better when large areas of the walls leak or water pressure outside is very high. After the inspection, we explain which method — or which combination — fits your house.
Do I need a sump pump for interior waterproofing?
In most cases, yes. The interior drain collects water, and the sump pump is what removes it from the house. Without a pump or another working discharge, the water would have nowhere to go. We size the pump for your basement and recommend a battery backup so the system keeps working during power outages.
Can interior waterproofing be installed in a finished basement?
Yes. We remove only the lower part of the drywall, baseboards and flooring along the affected walls, protect the rest of the space, and install the system. Once the work is complete, the walls can be rebuilt over the membrane, and the system stays hidden behind the finished surface.
Does interior foundation waterproofing require excavation outside?
No. All the work is done inside the basement — we cut a narrow trench in the floor along the walls, install the drain and restore the concrete. Your yard, driveway, patio and landscaping are not disturbed.
Can the City of Toronto subsidy help pay for my waterproofing project?
Partly. The City of Toronto Basement Flooding Protection Subsidy Program covers 80% of the cost of eligible devices up to set limits — for example, up to $2,250 for a sump pump, $300 for a battery backup and $1,600 per backwater valve — with a maximum of $6,650 per property. Interior drainage pipes and membranes are not listed as eligible items, so check the program rules on the City’s website before applying.
Is interior basement waterproofing a permanent solution?
A properly designed and installed interior system is a long-term solution, because it manages water pressure instead of only sealing the surface. Like any mechanical equipment, the sump pump and its battery need regular checks and eventual replacement, but the drainage system itself is built to stay in place under the floor. Every project comes with a written warranty on materials and workmanship.
What is the difference between interior waterproofing and damp-proofing?
Damp-proofing is a coating that slows moisture absorption through walls. It does not handle water under pressure and cannot stop active leaks. Interior waterproofing collects liquid water, redirects it to a sump pit and removes it from the house, so it solves leaks that coatings cannot.
How often should I maintain my interior drainage system?
Maintenance is minimal. We recommend testing the sump pump twice a year, before spring thaw and before the fall rains, checking that the discharge line outside is clear of ice and debris, and testing the battery backup. If the pump runs constantly or new damp spots appear, call us for a system check.
Interior Waterproofing Across Toronto & the GTA
Our team installs interior basement waterproofing systems throughout Toronto and the surrounding cities, including Old Toronto, Etobicoke, North York, Scarborough, Mississauga, Brampton, Vaughan, Markham, Richmond Hill, Oakville, Burlington and Milton. Wherever your home is, you get the same inspection, the same written quote and the same warranty. Our head office is in Etobicoke, and our crews work across the city and the GTA from Monday to Friday. If your area is not listed, call us — we will confirm whether we can serve your address.
Reviews about us
Quick, professional and at very reasonable cost. No hidden costs. The installation was complicated as the municipal sewage backed up when the pipe was cut, but the team did not complain despite working in harsh conditions.
Lev, Whitby
Leaquida Waterproofing was prompt, courteous and thorough. We would recommend to anyone. We had a backwater valve installed. I called Sunday, got a quote Monday, has the work done the following Monday (including issuing of building permit).
Trisha Grant
They have installed sump pump system in our house. They were very much on time and during the installation they have worked very clean.
You may rely on their advises.
Highly recommended.
Burçin, Toronto
Had your basement waterproofed by our team?
We would appreciate your feedback.
Waterproofing quotes often use technical terms. Here is what the most common ones mean:
Term
What It Means
Cove joint
The seam where the foundation wall meets the basement floor; the most common entry point for water
Hydrostatic pressure
The force of water in saturated soil pressing against foundation walls and the underside of the floor
Weeping tile
A perforated drainage pipe that collects groundwater around or under the foundation
Interior perimeter drain
Weeping tile installed inside the basement, below the floor along the walls
Sump pit and sump pump
A basin in the basement floor that collects drained water, and the pump that lifts it outside
Battery backup
A secondary pump or power source that runs the system during a power outage
Check valve
A one-way valve on the discharge pipe that stops water from flowing back into the pit
Dimple membrane
A plastic sheet with raised dimples that lets water run down the wall into the drain
Efflorescence
White, chalky salt deposits left on concrete when water evaporates from it
Backwater valve
A valve on the main sewer line that closes when the city sewer backs up
Crack injection
Sealing a concrete crack by filling it with polyurethane or epoxy under pressure
Damp-proofing
A coating that slows moisture absorption but does not stop water under pressure
Get Your Interior Waterproofing Quote
Stop worrying about the next heavy rain. Tell us what you are seeing in your basement, and we will inspect it, find the source of the water and give you a written quote for the right solution. Whether you are dealing with a small seep along one wall or a basement that floods every spring, our team will explain your options clearly and recommend the solution that fits your home and budget. Call us Monday to Friday, 7:00 AM – 4:00 PM, or send a request online.