- Varieties of sump pumps
- How to properly install a sump pump: step-by-step instructions
- No. 1: Preparing the installation site
- No. 2: Prepare the pump, secure it against clogs, and place it in the prepared pit
- No. 3: Make sure the float valve is operating properly
- No. 3: No. 4: Lay the pipe from the valve, bringing it outside the building
- No. 5: Connect the unit and check the operation
- No. 6: Concrete the area around the pump
If you are experiencing significant problems with high humidity in the basement, and regular flooding, then you should install a sump pump in the basement. With the help of this equipment, you will be able to normalize humidity in your basement and protect your property from potential damage.
You can install this equipment by yourself or with the help of professionals. Consider our article if you want the best way to install a sump pump. In this material, we will consider the most important installation points and offer step-by-step instructions on how to do it correctly.
Varieties of sump pumps
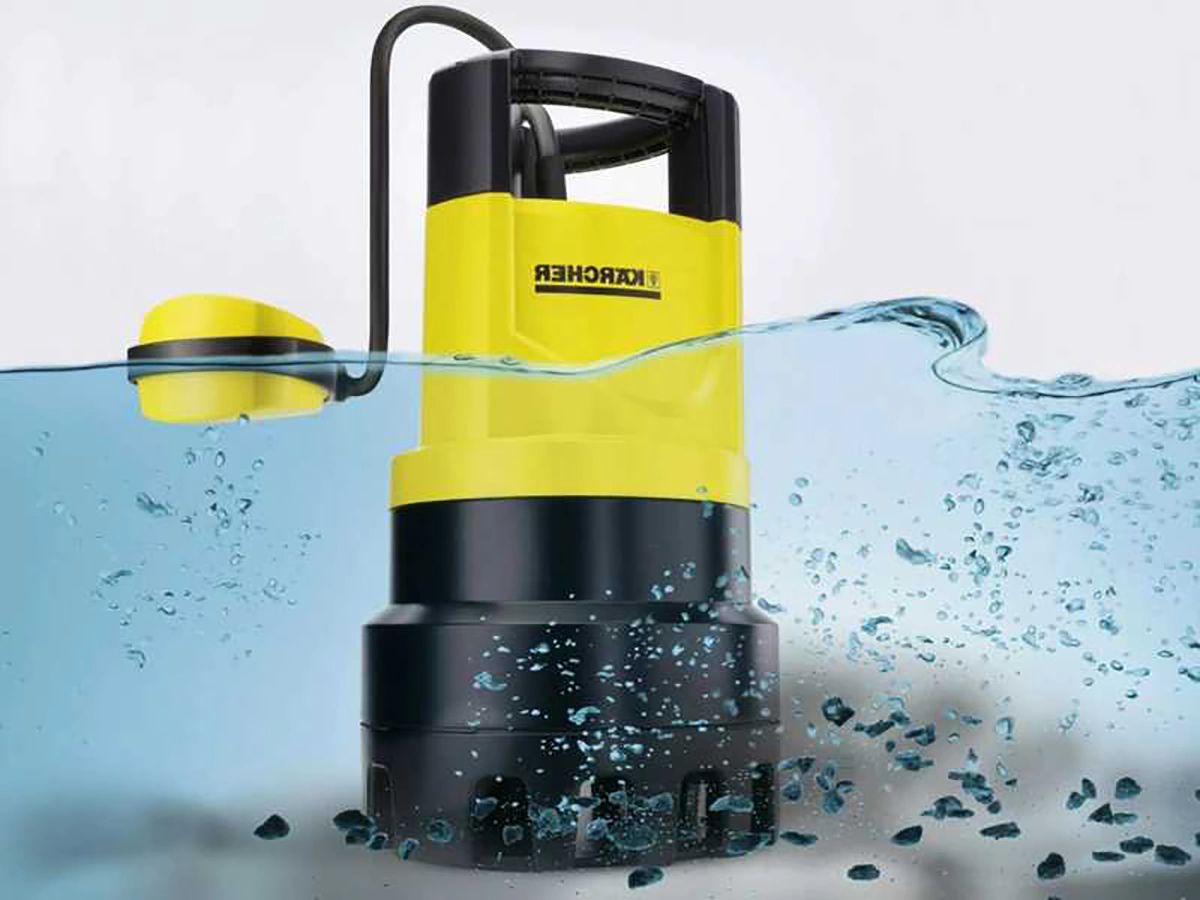
The sump pump on the basement floor can be different. Residential homes often use two types of equipment – submersible (the pump is completely in the sump) or pedestal (the equipment is only partially hidden, while the motor is completely submerged in water). These models differ in cost, operation volume, performance, ease of repair, and maintenance.
Submersible models are quieter, so they are often installed in residential buildings. But they will cost a little more, and getting to them in case of failure is more difficult. Sump pump set up in the basement most often comes from qualified plumbers, but with the presented task can also cope an experienced home handyman.
Rules for installing the pump with a backup battery
The electric pump is characterized by fairly high efficiency and affordable cost. But at the same time, it has a significant disadvantage – the unit does not work in the event of a power outage. Due to a heavy downpour, the power supply is often cut off, so the pump can not work when needed. The optimal solution in this situation is a battery sump pump installation. The sump pump will pump water out of the pit if the power supply is normal. If the power goes out, the battery backup sump pump installation will allow the unit to start automatically when there is enough water in the pit. The battery backup sump pump will be continuously charged with an electric charger, so it is ready to go at a moment’s notice.
Need Help Installing Your Sump Pump?
💧 Not confident doing it yourself?
Let our certified plumbers handle the installation for you — safely and efficiently.
👉 Book a professional sump pump installation now
Installation of the presented unit is quite simple:
- Put a check valve and trim its ends with Teflon tape.
- The battery should be placed in a special plastic case that protects it from moisture. It should then be marked on an elevated surface – never on the floor. The outdoor enclosure with the battery is best placed on a shelf on the wall.
- Make a pipe to drain the water.
- Hook up the sump pump to the mains.
How to properly put a double-sided pump
A dual sump pump installation is the best option for securing your home against damage triggered by an overflowing sump pump and a non-functioning pump. With this system, you can keep your home safe from flooding. Installing two sump pumps in one pit means creating a large cesspool to accommodate the equipment.
The pair of pumps are operated alternately. In this situation, the work of each piece of equipment alternates – while one works, the second stands on pause. Suppose the water gathers in the cesspool rather quickly, and one pump cannot cope with the drainage at a certain point. In that case, the second pump is activated to increase water pumping efficiency and prevent flooding significantly. Also, if one pump fails, the second pump will continue its operation, with a corresponding signal that one of the pumps has failed.
Double sump pump installation with alternating units is more feasible than installing a backup sump pump, which will only come on when the main one breaks down or fails. The fact is that an unused pump is subject to detrimental corrosion, so it may also be broken by the time it is activated. If you want to put a duplex system, in this situation, it is worth following the main rule of installation – creating a really big pit. A larger pit takes longer to fill and pump out, which minimizes the number of pump motor starts per hour.
How to properly install a sump pump: step-by-step instructions
To solve the issue of constant flooding, you need to add a sump pump in the basement. If you decide to do the work with your own hands, then it is worth following certain instructions in this situation. Before this, you must gather all the necessary materials and allocate sufficient time to carry out all the necessary work. Putting a sump pump in the basement by an experienced craftsman takes only one day. In addition, the last stage will take a little longer to cure the concrete fully, so you should check the weather forecast and ensure that the next few days are not expected precipitation.
Free Expert Advice Before You Start
🛠️ Planning to DIY your sump pump installation?
Contact us for a free consultation to make sure you have the right tools, setup, and support.
📞 Call us today or send us a quick message
Installing a sump pump under the house helps preserve the exterior of the building. All work will take place inside and will leave almost no trace behind. It is best to perform these manipulations before the rainy season. It is also worth doing it in clear weather with no floods. The work is easier to carry out when the soil is fairly dry.
It is also worth deciding exactly how many sump pumps are needed for your home. Often, a backup sump pump set up in the basement will come on when the main unit fails. Installing a second sump pump is similar to installing the main sump pump.
Proper installation of a sump pump involves several basic steps:
No. 1: Preparing the installation site
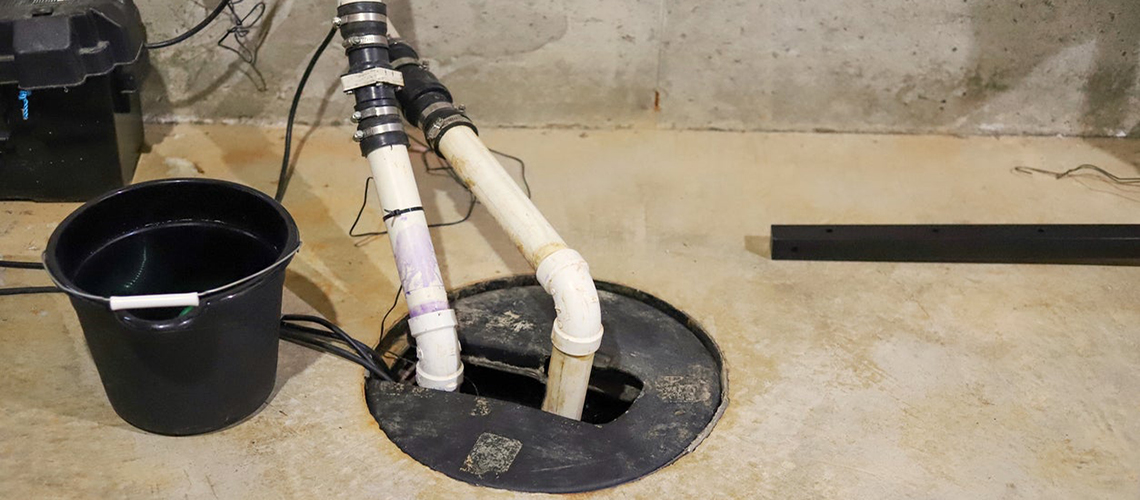
The first step is to find the lowest point in the basement. That is often where most water accumulates. When you find it, you can dig a hole for the pump. It should be wide and deep enough to allow the unit to enter comfortably, with the top edge of the pump flush with the basement flooring.
No. 2: Prepare the pump, secure it against clogs, and place it in the prepared pit
Many models of sump pumps have special drainage holes at the bottom and sides to allow water to flow safely. If they are unavailable, you can drill them yourself after it is necessary to wrap the tank from the outside with a filter cloth so that the unit does not clog with sediment, silt and other particles.
It is also necessary to arrange the pit itself under the pump, filling the gravel at the bottom of a layer of 2 to 3 inches. Next, you must put paving stones or rocks on the gravel to put a stable platform under the pump. After that, you can safely place the pump in the prepared pit and backfill it around the perimeter with the earth. Ensure the pump is as stable as possible and does not wobble, even if you push it.
No. 3: Make sure the float valve is operating properly
The float valve must move up and down smoothly. When water is drawn in, it lifts the float, which is the signal to start the unit to pump it out. Be sure to check the operation of the float valve before proceeding with the installation. In this situation, move it up and down with your hand, ensuring it works freely.
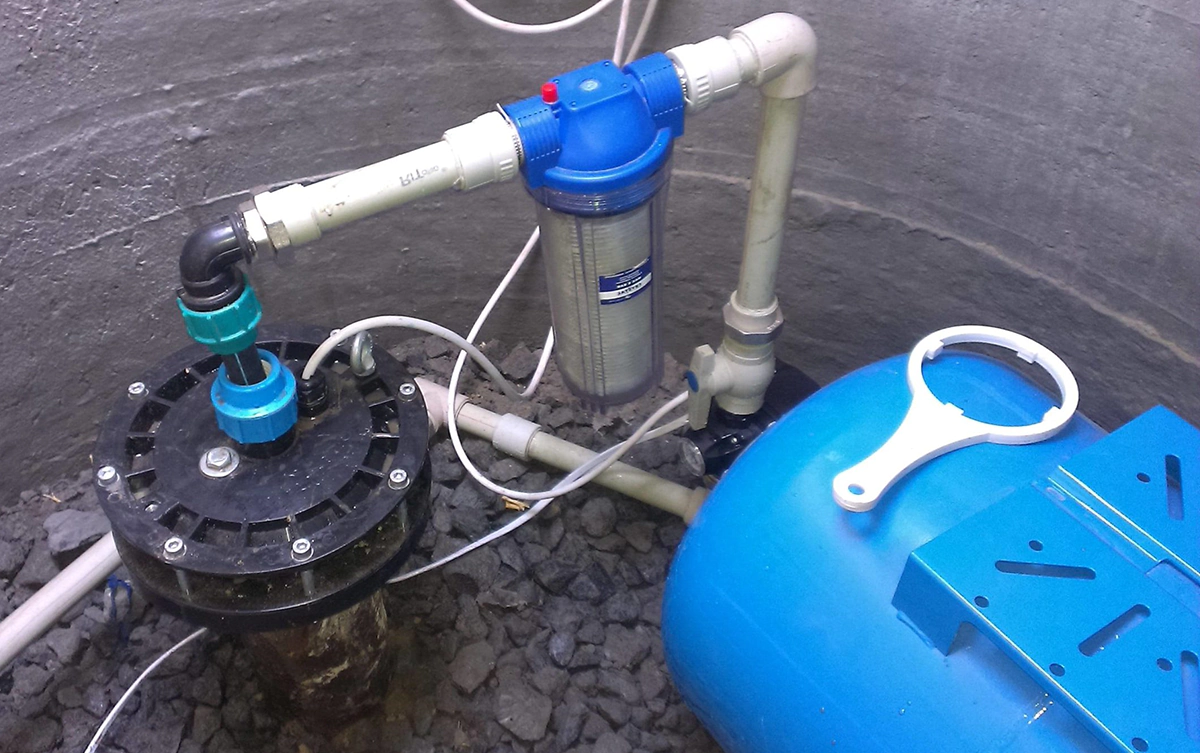
No. 4: Lay the pipe from the valve, bringing it outside the building
Also of great importance for the quality operation of the unit is a check valve. It is the one that is responsible for taking the inlet out of the sump and preventing it from getting in. Between the valve and the facade of the building is certainly worth continuing the pipe. When the output of the hose joins the basement room wall, it is worth making a fairly large hole so that the pipe easily passes through it. In this situation, it is necessary to take a special tool with a ring nozzle to work easier. Also, it is worth treating it with sealant after the pipe passes through the hole in the wall.
No. 5: Connect the unit and check the operation
At this point, the sump pump connection is made, and a test run is performed. It requires filling a basin almost up to the top with water. The float should rise, and the water pump should start. It is also worth checking all connections to see if there is any water leakage. If everything works fine, you can close the bowl with the lid.
No. 6: Concrete the area around the pump
In the end, it’s worth covering the space around the pump. Often it is concreted. It requires mixing the concrete mixture with water to a fairly thick consistency and spreading the resulting mortar around the pump, with the need to cover everything except the unit’s cover. It remains only to wait for the complete hardening of the mixture, and the work is considered finished.
Adding a Sump Pump to an Existing Basement
Not every basement is built with a sump system, but that doesn’t mean you’re out of options. If water is seeping through the floor or walls, or if dampness never seems to go away, adding a sump pump to an existing basement can make a huge difference. It’s essentially a retrofit project designed to protect your home from flooding and long-term moisture damage.
Instead of starting from scratch, the process begins with choosing the right spot—usually the lowest area of the floor where water tends to collect. From there, a pit is created by breaking through the concrete and digging deep enough to hold the sump basin securely. Once the basin is set, gravel is added for drainage, and the new pump is lowered into place.
The pump is then connected to a discharge pipe that carries water away from the foundation. After testing the float switch to ensure the system activates correctly, the floor is sealed again, leaving only the sump cover visible. From the outside, the upgrade is barely noticeable—but the protection it provides is immediate.
💡 Homeowner’s note: retrofitting a sump pump can be messy, especially in a finished basement. Many people choose to bring in professionals who have the tools to cut concrete cleanly, install the system quickly, and make sure everything meets building code.
How to Change a Sump Pump: Replacement Guide
Over time, every sump pump reaches the end of its service life. On average, these devices work reliably for about 7–10 years, after which replacement becomes necessary. Knowing how to change a sump pump helps you prevent sudden failures during heavy rain or basement flooding.
Step 1. Disconnect power and water lines
Unplug the old unit from the outlet and shut off the main water connection if applicable. This prevents electrical hazards and accidental leaks during the process.
Step 2. Remove the old pump
Detach the discharge pipe and carefully lift the pump out of the pit. Some sediment or standing water may remain, so it’s best to have a bucket or towels ready.
Step 3. Prepare the pit
Clean the sump basin from debris, silt, and stones. A smooth and clear bottom ensures stable placement of the new device. If needed, add a layer of gravel for proper drainage.
Step 4. Install the new pump
Lower the replacement pump into the pit, aligning it on a level base. Reattach the discharge pipe, making sure to use Teflon tape on threaded connections to prevent leaks.
Step 5. Test the float and operation
Fill the basin with water until the float rises. The pump should activate immediately and drain the water efficiently. Check for unusual noises or vibrations during the test run.
Step 6. Seal and finish
Once you confirm correct operation, seal the area around the sump with concrete if required, and reconnect the power supply.
📌 Tip: If you’re replacing an older model, consider upgrading to a more powerful unit or installing a backup sump pump to ensure full protection against flooding.
Frequently Asked Questions About DIY Sump Pump Installation
You’ll need a drill, concrete saw or jackhammer (for new pits), pipe wrenches, Teflon tape, PVC pipe and fittings, gravel, and sealant. Most supplies are available at a hardware store.
Choose the lowest point of the floor where water usually gathers. This ensures the pump activates as soon as water begins to collect.
Most sump pits are at least 2 feet deep and 18–24 inches wide. The pit should be large enough for the basin and provide space for water collection without constant cycling.
Not usually. In existing basements, you’ll likely need to cut through the floor to create a pit. If you already have a sump basin, you can replace the pump without breaking concrete.
Pour a bucket of water into the pit. The float switch should rise, and the pump should start draining water through the discharge pipe. Check for leaks and make sure the water flows outside, away from your foundation.
• Pedestal pumps sit above the pit and are easier to service, but noisier.
• Submersible pumps are fully inside the pit, quieter, and better for finished basements, though harder to access for repairs.
It’s highly recommended. A battery or water-powered backup keeps working during power outages, which often happen during storms when you need the pump most.
 CLOGGED OR BROKEN WEEPING TILE